Showing posts with label Egg free. Show all posts

Slow Roasted Salmon with Herbed Yogurt (AIP, Paleo, low FODMAP, Whole 30)

Slow Roasted Salmon with Herbed Yogurt (AIP, Paleo, low FODMAP, Whole 30)

Wild-caught salmon is an ingredient I almost always keep stocked in our freezer. Not only is it a superfood protein, but salmon is also quick and easy to both thaw AND cook. Plus, it’s delicious :)

Slow Roasted Salmon with Herbed Yogurt (AIP, Paleo, low FODMAP, Whole 30)

As much as I love to meal plan (really, I do love having a plan), I still find myself uninspired on occasion. There are times I find myself gazing into the refrigerator and freezer, wishing the illusive dinner faeries would show up & make a meal for me. Some days, I’m tired, or I’ve been working on other tasks & lost track of the time, or I’ve miscalculated the time it will take to thaw another protein, or I’m missing key ingredients. In those cases, salmon can come to the rescue!

Slow Roasted Salmon with Herbed Yogurt (AIP, Paleo, low FODMAP, Whole 30)

Most salmon recipes I’ve seen call for the fish to be cooked at high temperatures. Sautéing at high heat. Broiling. Roasting. When I saw a recipe, via my Facebook newsfeed, for a slow roasted salmon, baked at a very low temperature, I was intrigued. The recipe required only a few very tiny tweaks to keep it completely AIP. I soon tried it out & was hooked!

Slow Roasted Salmon with Herbed Yogurt (AIP, Paleo, low FODMAP, Whole 30)

The finished salmon is much more tender & almost creamy than if it was cooked at higher temperatures. We’ve enjoyed eating the salmon warm for dinner, like these pictures, often paired with an herbed yogurt & sauteed spinach. Or, I usually make an extra filet or two & eat the leftovers cold on salad the following day.

Note on FODMAPs: FODMAPs are confusing things... Certain resources will say that one item is “ok” and other resources will list that item as “avoid.” I am choosing to get my information about FODMAPs from Monash University & their app. Monash is continually updating their information & they are great about listing what quantity of food (both by volume & by weight) keeps it within the low FODMAP guidelines. As always, though, you know your body best. Just because one list says a food is fine, doesn’t always mean your body will be fine with it. Or on the flip side, just because one list says a food is on the avoid list, doesn’t mean your body is automatically going to be bothered by it. Do what makes your body & mind feel the best.

Slow Roasted Salmon with Herbed Yogurt (AIP, Paleo, low FODMAP, Whole 30)
Yields two servings, but can easily be scaled up for more servings

For the salmon
adapted from Sally Schneider via Food52

1 Tbl Olive Oil, divided
2 filets (approximately 12 to 16 oz) Wild-caught Salmon
1/2 tsp Sea Salt
bunch Fresh Thyme

sliced scallion & chopped dill, for serving
Herbed yogurt (recipe follows), for serving
  1. Preheat the oven to 275 F (I usually use my toaster oven). Oil a small sheet pan with half the olive oil. 
  2. Place the salmon filets skin side down on the prepared pan. Drizzle the remaining oil over the top of the fish & sprinkle with salt. Tuck several sprigs of fresh thyme underneath each salmon filet. 
  3. Roast for 15 to 20 minutes, or until the salmon reaches an internal temperature of 120 F. 
  4. Remove from the oven & sprinkle with sliced scallion & chopped dill. Serve with herbed yogurt (recipe follows), if desired. 

For the herbed yogurt
1/2 c Two-Ingredient Coconut Yogurt 
1 Tbl (approximately 3 g) chopped dill
1 Tbl (approximately 2 g) chopped parsley
1 Tbl (approximately 5 g) chopped scallion
1/4 tsp Sea Salt
  1. Mix all the ingredients together. 
  2. Store in the refrigerator until ready to serve.  
Sautéed Spinach 
Yields two servings 

4 Tbl Oil of choice (avocado, olive, melted duck fat or bacon drippings etc.) 
550 g fresh spinach
  1. In a large pan, heat the oil over medium high heat. 
  2. Add the fresh spinach (in batches, if necessary) to the hot pan, cover and turn off the burner. Allow the spinach to wilt down. 
  3. Serve immediately. 

Beef Stew (AIP, Paleo, Low FODMAP, Whole 30)

Beef Stew (AIP, Paleo, Low FODMAP, Whole 30)

Traditionally, as summer moves to fall, many people’s preferences move from grilling to braising and roasting. I confess that even though it was considered seasonally inappropriate, I kept braising and roasting throughout the summer. I blame it on my new favorite kitchen appliance, my Instant Pot (or as my mom refers to it, a “turbo crock-pot”). 

Beef Stew (AIP, Paleo, Low FODMAP, Whole 30)

With the help of my Instant Pot  I’ve been making this beef stew since July when I originally went back to strict AIP & added a low FODMAP component. I didn’t know if it was possible to make palatable beef stew without high FODMAP ingredients like onions, shallots, garlic & mushrooms. Brainstorming different vegetable options & changing my mindset of what were “necessary” stew ingredients allowed me to create this really phenomenal stew. 

Beef Stew (AIP, Paleo, Low FODMAP, Whole 30)

My preference these days is to make as many things in my Instant Pot ,  as possible, but since I realize that not everyone may have this particular appliance, I’ve written out stovetop approximations too. One of the other things I appreciate about this recipe is that it is comprised of primarily “staple” ingredients, or ingredients that I generally have on hand all the time. Carrots, and rutabaga are really hearty veggies that keep in the refrigerator for a good amount of time. Leek greens, if stored properly, can also last a while. I keep meat, broth, and bacon in the freezer at all times. And in a pinch, dried herbs can be substituted for fresh ones. 

Beef Stew (AIP, Paleo, Low FODMAP, Whole 30)

The stew is really great on its own, but if you want to bulk it up further or serve it for a celebratory meal, I also like to serve it over mashed (white) sweet potatoes or squash. And I’ve often added a few spoonfuls of braised greens (I love this recipe from the Paleo Cajun Lady, & usually make it with chopped swiss chard & bacon & omitting the garlic to make it Low FODMAP) to the stew to up the vegetable content. Additionally, the leftovers freeze beautifully & there’s nothing quite like finding a jar of delicious beef stew in your freezer on a day when you’re not in the mood to cook.  

Beef Stew (AIP, Paleo, Low FODMAP, Whole 30)

Note on FODMAPs: FODMAPs are confusing things... Certain resources will say that one item is “ok” and other resources will list that item as “avoid.” I am choosing to get my information about FODMAPs from Monash University & their app. Monash is continually updating their information & they are great about listing what quantity of food (both by volume & by weight) keeps it within the low FODMAP guidelines. As always, though, you know your body best. Just because one list says a food is fine, doesn’t always mean your body will be fine with it. Or on the flip side, just because one list says a food is on the avoid list, doesn’t mean your body is automatically going to be bothered by it. Do what makes your body & mind feel the best.

Low FODMAP Beef Stew (AIP, Paleo, Whole 30)
Yield’s 6 to 8 servings 

2 Tbl solid fat (I used duck fat, but bacon drippings or lard could be substituted as well) 
2 lbs Grassfed Beef Stew Meat 
4 strips Bacon, cut into small pieces 
2 heaping cups (approximately 140 g) chopped leek greens and/or scallion greens (I used a mix of the two) 
2 heaping cups (approximately 425 g) chopped carrots 
2 heaping cups (approximately 365 g) cubed rutabaga 
1.5 c bone broth
1.5 c red wine (I’ve used both merlot and cabernet sauvignon) 
2 dried bay leaves
1 Tbl salt
Few sprigs of fresh thyme & parsley, plus additional for serving 

Instant Pot Instructions: my preferred method of cooking 
  1.  Add the fat to the insert of an Instant Pot . Turn the pot onto “Sauté” & allow the fat to melt. 
  2. Dry the meat very well. Brown the beef on all sides, in batches, in the sautéing Instant Pot --it usually takes me three batches to brown 2 lbs of stew meat. Remove the browned beef & set aside. 
  3. Sauté the bacon & leek/scallion greens in the Instant Pot until the bacon begins to crisp & the leeks/scallions begin to wilt. Stir occasionally. 
  4. Add the carrots & rutabaga, broth, wine, and browned beef. Stir to combine. Tuck the bay leaf & herbs into the mixture. 
  5. Place the top on the Instant Pot & make sure the vent is closed . Pressure cook using the manual setting for 50 minutes at high heat. Note: the entire process will take longer than 50 minutes because it does take time for the pot to come up to pressure. 
  6. Once the machine has beeped, allow it to switch to the “keep warm” function or turn completely off for 15 minutes to let the pressure come down a bit. Use a silicone oven mitt or heavy kitchen towel to move the vent from the “sealing” position to the “venting” position. Allow all the steam to escape then it is safe to open the lid.
  7. Serve the stew on its own, or along side a starchy vegetable. Adding extra cooked greens is also a great option. Sprinkle with some extra chopped herbs just before serving. 
  8. Store any leftovers in the refrigerator or freezer. 
Stovetop Instructions 
  1. In a large dutch oven, melt the fat over medium high heat. 
  2. Dry the meat very well. Brown the beef on all sides, in batches if necessary. Remove the browned beef & set aside.
  3. Sauté the bacon & leek/scallion greens until the bacon begins to crisp & the leeks/scallions begin to wilt. Stir occasionally.
  4. Add the carrots & rutabaga, broth, wine, and browned beef. Stir to combine. Tuck the bay leaf & herbs into the mixture.
  5. Bring to a simmer, reduce the heat to low, cover & allow to gently cook for 2-4 hours, or until the beef is tender. 
  6. Serve the stew on its own, or along side a starchy vegetable. Adding extra cooked greens is also a great option. Sprinkle with some extra chopped herbs just before serving. 
  7. Store any leftovers in the refrigerator or freezer.
This post contains affiliate links. Thanks for supporting Sweet Treats. 

Passion Fruit Yogurt Parfaits with Cassava Crumble (AIP, low FODMAP, Paleo, Vegan)

Passion Fruit Yogurt Parfait with Cassava Crumble (AIP, low FODMAP, Paleo, Vegan)

For the past month or so, I’ve been making at least one batch of AIP two-ingredinet Instant Pot coconut yogurt a week, as I developed & finessed the recipe. I’ve used the yogurt in several applications, but this parfait might be one of my favorite sweet servings. I love using just a hint of maple & letting the sweet/tart flavor of the yogurt + fruit shine through. And let’s not forget about the crunch of the toasted cassava crumble, which makes a great stand-in for granola.

Passion Fruit Yogurt Parfait with Cassava Crumble (AIP, low FODMAP, Paleo, Vegan)

I’m not really sure if this passion fruit coconut yogurt parfait should be classified as a treat or as a breakfast food. For the sake of AIP nutrient density guidelines, it should probably be a treat, but I must admit, I have eaten one or two for breakfast, alongside a serving of protein and vegetables.  

Passion Fruit Yogurt Parfait with Cassava Crumble (AIP, low FODMAP, Paleo, Vegan)

Passion fruit isn’t always easy to find, but often Asian grocery stores will carry it. Back in August, I was thrilled to find actual passion fruits on sale at Whole Foods. I really, really love the tart, flower-y flavor of passion fruit--it’s almost like sour candy for adults. We even had passion fruit curd filing on one of our wedding cakes. And passion fruit is low FODMAP too! Yay! Just don’t eat more than 5 at one time….   

Passion Fruit Yogurt Parfait with Cassava Crumble (AIP, low FODMAP, Paleo, Vegan)

When ripe, the fruit should be dark purple on the exterior & wrinkly. Cut the ripe fruit in half & use a spoon to scoop out the pulp & seeds--both are edible. I personally like the crunch of the seeds, but you could go through the laborious task of straining out the seeds, if desired. 

Passion Fruit Yogurt Parfait with Cassava Crumble (AIP, low FODMAP, Paleo, Vegan)

This parfait could be made with other fruit too, if passion fruit can’t be found or aren’t to your liking. I’ve also tried mixed berries (blueberries/strawberries/raspberries are all low FODMAP), as well as a rhubarb compote similar to this one (substituting maple for the honey to keep it low FODMAP). 

Passion Fruit Yogurt Parfait with Cassava Crumble (AIP, low FODMAP, Paleo, Vegan)

Note on FODMAPs: FODMAPs are confusing things... Certain resources will say that one item is “ok” and other resources will list that item as “avoid.” I am choosing to get my information about FODMAPs from Monash University & their app. Monash is continually updating their information & they are great about listing what quantity of food (both by volume & by weight) keeps it within the low FODMAP guidelines. As always, though, you know your body best. Just because one list says a food is fine, doesn’t always mean your body will be fine with it. Or on the flip side, just because one list says a food is on the avoid list, doesn’t mean your body is automatically going to be bothered by it. Do what makes your body & mind feel the best.

Passion Fruit Yogurt Parfait with Cassava Crumble (AIP, low FODMAP, Paleo, Vegan)

Passion Fruit Yogurt Parfaits with Cassava Crumble (AIP, low FODMAP, Paleo, Vegan) 

Crumble
1/8 tsp Sea Salt
1 1/2 tsp Grade B Maple Syrup
28 g / 2 Tbl Coconut Oil
  1. Preheat oven to 350 F. Line a baking sheet with parchment paper. 
  2. Mix all the ingredients with a fork in a small bowl until the ingredients are crumbly. 
  3. Spread in an even layer (clumps are ok) on the prepared baking sheet. 
  4. Bake for 10 minutes, rotate the pan, and bake an additional 5 to 10 minutes, or until golden. Set aside to cool
Vanilla Maple Coconut Milk Yogurt
yields enough for 3 parfaits 

1 c Two Ingredient Instant Pot Coconut Yogurt (or other AIP-compliant coconut yogurt) 
  1. Add all the ingredients to a mixing bowl. Stir to combine. Reserve in the refrigerator until ready to assemble parfaits & serve. 
Assembly--per parfait 
**assemble right before serving**

1/3 c Vanilla Maple Coconut Milk Yogurt 
seeds from 1 Ripe Passion fruit
1 Tbl Crumble 
  1. Portion the yogurt into a small bowl or other small vessel. 
  2. Top the yogurt with half of the passion fruit pulp/seed. 
  3. Sprinkle the crumble over the top. Add the remaining passion fruit. 
  4. Serve immediately. 
This post contains affiliate links. Thanks for supporting Sweet Treats. 

Berry Panna Cotta Pie (AIP & Paleo)

Berry Panna Cotta Pie (AIP & Paleo)

Last weekend, we celebrated Independence Day (aka the 4th of July) in the US. The holiday sort of sneaked up on me, after a busier-than-average June, so I did not have time to concoct a new AIP patriotic dessert this year. I planned to make the patriotic panna cotta I posted last year (actually, it’s one of my most favorite, easiest AIP desserts because you really can substitute almost any fruit you like). At the last minute, I had an epiphany to make the panna cotta into a pie by first making an AIP pie crust (I used a recipe from my friend Martine at The Paleo Partridge), then filling the baked/cooled shell with berries & adding the panna cotta custard liquid. 

Berry Panna Cotta Pie (AIP & Paleo)

The results were spectacular! The pie tasted very reminiscent of the fruit tarts I use to make in my pre-AIP/paleo days & are something that I really miss.  I remarked to my husband, as we sampled the pie, that it tasted so “normal.” Martine’s crust was almost like a short bread cookie, very similar to the pate sucree I use to make for all my tarts. The creamy coconut filling wasn’t overwhelmingly coconut-y & pared so well with ripe berries & the almost buttery crust. I had to pinch myself that the dessert was completely AIP!!

Berry Panna Cotta Pie (AIP & Paleo)

Though I hadn’t intended to do a blog post on this pie, the reactions to the image I posted on Instagram were so great that I thought a post would be nice to make the recipe easier to find (and let’s be honest, more pin-able, since I can’t keep track of recipes very well unless I can pin them to Pinterest). I believe this crust/fruit/panna cotta custard combination would work well with fruits other than berries (peaches, plums, nectarines, cherries, apples, pears, figs... etc) when berries are no longer in season. If you try another fruit variation, please post a picture on Instagram & tag me (@lauravein) in it!

Berry Panna Cotta Pie 
yields 8 servings, or one 9 inch pie  

250 g (approximately 2 cups) berries or other fruit of choice (I used strawberries, blueberries, blackberries & raspberries)
1 recipe of Panna Cotta custard 
  1. Make the sweet & savory pie crust according to the directions on Martine’s web site. The only changes I made were to skip piercing the bottom of the crust before baking (I didn’t want the filling to run out later) & to bake it 5 minutes longer because I didn’t want to risk the crust getting soggy from the filling. 
  2. While the pie shell is cooling, prepare the berries, cutting them if desired. Place the fruit into the bottom of the cooled shell. 
  3. Make the panna cotta custard according to the directions--Omit the vanilla for elimination phase AIP. Set the berry-filled pie shell onto a sheet pan for easier transport, then carefully pour the custard over the fruit. 
  4. Allow the pie to chill until the custard is set, approximately 2 hours. Let the pie sit at room temperature at least 10 minutes before serving. Refrigerate any leftovers, covered, in the refrigerator. The pie is best consumed within 24-36 hours, or else the crust begins to get soggy.

Paleo Fudge Sauce & AIP Carob Sauce


Paleo Fudge Sauce & AIP Carob Sauce

This year, as a Fathers Day gift to my dad, I “paleo-ified” one of his favorite treats. Next weekend, during a visit to ND, I’ll be making him that treat AND giving him the recipe (watch for that full recipe in a future post).  Most people can follow the 80/20 rule for paleo, meaning paleo is followed 80% of the time & during the remaining 20%, certain indulgences/choices can be made to eat non-paleo foods.  While a person could choose to indulge in a non-paleo, store-bought chocolate sauce, I developed this sauce as a slightly better-for-you option.

Paleo Fudge Sauce

Still keep in mind, this paleo fudge sauce is still very much a treat.... Just because the title includes the name “paleo,” doesn’t make it a health food. However, it’s ingredients are a bit more clean than some of the store bought versions.  So far, we’ve eaten the sauce straight from the jar with a spoon (oops), added it to coffee and coconut cream to make a homemade mocha, and drizzled warmed sauce over coconut ice cream.

AIP Carob Sauce

Though I realized as I’ve been posting some pictures on Instagram of my test batches, perhaps developing an AIP-compliant sauce for those who haven’t yet reintroduced chocolate would also be a good idea. When following AIP, there is no 80/20 rule--following AIP 100% & reintroducing foods one-by-one, very slowly is the only way to succeed. Part of the reason I create AIP treats is specifically so that we don’t have to feel left out during times of celebration when others may be consuming foods we cannot.  Carob doesn’t taste exactly like chocolate, but if you’re someone who cannot eat chocolate, it makes a pretty tasty treat option stirred into coconut milk or drizzled over coconut milk ice cream.

Paleo Fudge Sauce & AIP Carob Sauce

Paleo Fudge Sauce: Paleo, AIP Reintro, Vegan

28 g / 1 oz / (a little less than 6 Tbl) Cacao Powder
160 g / 5.65 oz / heaping 1/2 c Grade B Maple Syrup
85 g / 3 oz / 1/4 c + 2 Tbl Coconut Cream
1/2 tsp Sea Salt
30 g / 2 Tbl Enjoy Lifechocolate chips
1 t Vanilla Extract
14 g / 1 Tbl Coconut Oil

  1. Combine the cacao, maple, coconut cream, and sea salt in a small saucepan. 
  2. Bring to a boil over medium high heat. Reduce the heat to medium low & simmer for 3 minutes. Whisk constantly throughout. 
  3. Remove from the heat and whisk in the coconut oil & vanilla extract.  
  4. Pour into a jar, cool at room temperature & store in the refrigerator. The sauce will become solid in the refrigerator, so reheat as necessary for serving. 


Notes:

  • I have created this recipe using the gram weight figures & later converted it to volume for your convenience. However, I have not tested the volumetric measurements, so keep that in mind. I highly recommend getting a Digital Kitchen Scale & weighing ingredients whenever possible. 
  • Honey may be substituted for the maple syrup, but such a substitution will make the recipe no longer vegan. 
  • I have not tested any other brands of chocolate chips other than Enjoy Life--other brands may be more or less sweet. 

AIP Carob Syrup

28 g / 4 Tbl Carob Powder
3 oz / 1/4 c Raw Honey
2 Tbl Filtered Water
1/2 tsp Ground Cinnamon
1/2 tsp Vanilla Extract
1/4 tsp Sea Salt
14 g / 1 Tbl Coconut Oil
1 Tbl Coconut Cream

  1. Combine the carob, honey, water, cinnamon, vanilla & sea salt in a small saucepan. 
  2. Heat over medium high heat, stirring constantly, until the mixture boils. Reduce the heat to medium and simmer 3 minutes, continuing to stir constantly.
  3. Remove from the heat and whisk in the coconut oil & coconut cream. 
  4. Pour into a small jar, cool at room temperature & store in the refrigerator.

This post contains affiliate links. Thanks for supporting Sweet Treats. 

Herbed Pork Tenderloin with Rhubarb Sauce (AIP/Paleo)

Herbed Pork Tenderloin with Rhubarb Sauce (AIP/Paleo)

While It’s still rhubarb season, I thought I’d share a recipe I’ve been developing. This recipe is also one I gave a sneak peak of over on the Autoimmune Paleo Instagram account when I guest-posted a couple weeks ago.

With summer very quickly approaching & my tastes beginning to gravitate more towards blueberries & stone fruit, I wanted to share one more rhubarb recipe for this season. Did you know that rhubarb is actually a vegetable? Somehow, that knowledge gives me immense satisfaction, as I am consciously trying to increase daily my vegetable intake. I guess most vegetables don’t require the addition of honey or maple syrup (or apple juice) to make them palatable, but perhaps lets just forget that pesky fact ;)

Rhubarb is more often used in desserts, but this application proves it can work with savory foods just as well. This sauce has a great, pure rhubarb flavor (no strawberries in sight, rhubarb purists) while still remaining a little on the tart side. I’ve paired it with an herbed pork tenderloin, but I can imagine it might also be a great dipping sauce for meatballs or for roasted chicken.  Depending on where you live, rhubarb stalk color can vary greatly.... The first couple batches of rhubarb I bought were bright red & produced a very red sauce; however, my latest batch was more on the green side & the sauce was not nearly as colorful. Even my less-colorful batch was delicious, so don’t stress if your sauce isn’t quite as vibrant as my photo.

In case anyone is curious, I served the pork with some sautéed asparagus & butternut squash "risotto."

Herbed Pork Tenderloin with Rhubarb Sauce (AIP/Paleo)

Herbed Pork Tenderloin with Rhubarb Sauce
yields 2 to 3 servings 

1 1lb Pork Loin
4 tsp chopped fresh herbs (I like equal parts thyme, sage, parsley, and rosemary, but use what you have)
1/2 tsp sea salt
1 Tbl oil (I’ve used melted duck fat and avocado oil), plus an additional tablespoon for the pan.
Rhubarb Sauce, recipe follows

  1. Dry the pork tenderloin well. In a small bowl, mix together the herbs & sea salt. Rub the tenderloin with 1 Tbl oil & sprinkle with the herb/salt mix. Allow to sit at room temperature for 10 minutes. Preheat the oven to 350 F. 
  2. Heat some additional oil in a cast iron skillet (or other heavy skillet). Sear the tenderloin (cut it in half if necessary) on all sides over medium high heat, rotating as necessary. The searing process should take around 5 minutes. 
  3. Transfer the tenderloin to the preheated oven & roast for 5 to 10 additional minutes, or until an instant thermometer inserted into the tenderloin reads 150 F. 
  4. Remove the pork from the oven & allow to rest for 10 minutes before slicing. Serve with rhubarb sauce, if desired. 

Rhubarb Sauce
250 g  (2 cups) sliced rhubarb (fresh or frozen)
75 g (1/3 c) filtered water
42 g (2 Tbl) Raw Honey, plus additional if needed

  1. Combine all the ingredients in a small sauce pan.
  2. Bring to a boil over medium heat. Reduce heat to a simmer and cook for 15 minutes, stirring occasionally. 
  3. Remove from the heat & carefully taste a little of the sauce. If the rhubarb is still exceptionally tart, add an additional tablespoon of honey. 
  4. Serve either warm, cold or room temperature with the herbed pork tenderloin. Refrigerate any leftovers. 

The Autoimmune Wellness Bundle

The Autoimmune Wellness Bundle
NOTE: This bundle offer is extremely time sensitive! Act quickly before it’s gone… 
Also, this post contains affiliate links. Thanks for supporting Sweet Treats!  

The Autoimmune Protocol of Paleo (AIP) literally gave me back the life I never thought I’d have again. Two years ago, I was diagnosed with an autoimmune disease called Interstitial Cystitis. Not long after that, I was also diagnosed with severe gluten intolerance (most likely celiac, though I can’t do the official gluten challenge test anymore, due to the severity of my reaction), IBS, fibromyalgia/chronic joint & muscle pain, hypothyroidism and other conditions. 

None of those conditions are curable, as of yet. They may never be curable. I was warned by my doctors that I needed to embrace “a new normal,” get use to dealing with symptoms for the rest of my life & plan to depend on medications for the rest of my life. The pain and fatigue were tremendous & I never knew exactly how I might feel from day to day. And to be honest, it was really emotionally challenging to think that life might never get better....

After going the conventional treatment route for a while, and at the convincing of my parents, I decided to try an alternative. I started seeing a holistic doctor in April 2014, who put me on a “detox diet.” Searching for recipes and resources for my “detox diet” is what lead me to find the Autoimmune Protocol of Paleo (AIP) & to discover that what I thought was simply a “detox diet” is so so much more! AIP is a more longterm comittment that uses food and lifestyle factors to manage these health conditions. Plus, there’s an entire online community of other people also following AIP who help provide resources/recipes & act as a support system! 

These days, after more than a year on AIP, I’m in a much better, healthier place. I have experienced tremendous improvements. My symptoms may not be entirely gone & I still have some flare-ups, but the number of good days outweighs the not-so-good days.  I’ve slowly been able to successfully reintroduce some formerly problematic foods. I’ve become a better advocate for myself & more educated on a variety health conditions. I’m finding a balance between the natural & holistic, while still remaining open to conventional medicine options.

I’ve always been a tender-hearted, highly sensitive person. My heart breaks for others who are going through challenging health conditions & who don’t have the hope I have. I want to give everyone with autoimmune conditions (or other chronic health conditions) some AIP paleo kool-aid--or perhaps kombucha would be a better option ;) But many people aren’t open to to the changes AIP requires (there is no 80/20 rule, like with paleo). Or they don’t know where to start. Or they think it will be too difficult to actually implement…. 

The Autoimmune Wellness Bundle: e-books


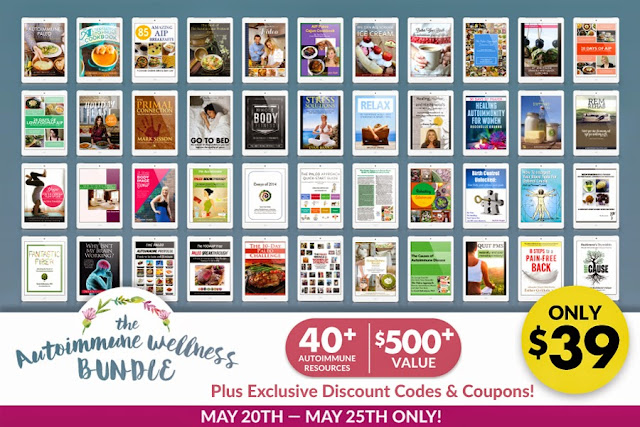
Which brings me to this very special project that Sarah Ballantyne, PhD of “The Paleo Mom”  LINK and her team have compiled: the first ever all Autoimmune Protocol-compliant bundle! I only wish something like this had been available when I was starting my AIP journey. 45 e-books (worth over $500, if purchased individually) and 26 discount codes all for just $39!! WHOA!! But it’s only available through Monday, May 25, 2015. 

Included in The Autoimmune Wellness Bundle are 15 AIP cookbooks and meal plans, including two of my favorites Mickey Trescott’s “The Autoimmune Paleo Cookbook” and Bre’anna Emmitt’s “He Won’t Know It’s Paleo,” 15 lifestyle and exercise guides, 15 beyond the basics e-books (which go into more detail about different health conditions & factors), 9 brand new e-books, 26 discount codes for AIP-friendly products/vendors, and a brand new, exclusive e-book "The Best of the Autoimmune Protocol 2015." 

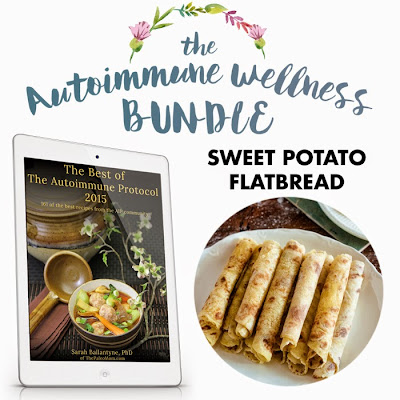
The Autoimmune Wellness Bundle: Sweet Potato Flat Bread

I was honored to contribute to “The Best of the Autoimmune Protocol 2015” exclusive-to-this-bundle e-book, which contains over 160 recipes from the best of the autoimmune authors, bloggers & recipe developers. I’m not going to lie, I’m still pinching myself that I was included in such a prestigious group. :) 

I urge you to consider investing in “The Autoimmune Wellness Bundle," whether for yourself or for someone you know dealing with chronic health issues. Or, for those in the hospitality/food and beverage industry, the Paleo & AIP movement is growing tremendously & this bundle is an awesome deal for some great recipe resources, when you find yourself needing to offer clients Paleo and/or AIP options. 

Take advantage of this incredible deal before Monday, May 25th! 

This post contains affiliate links. Thanks for supporting Sweet Treats.

Strawberry Rhubarb Crumbles (AIP, Paleo, Vegan)

Strawberry Rhubarb Crumbles (AIP, Paleo, Vegan)

When I spotted fresh rhubarb in the produce section on my grocery trip last week, my mouth started watering. Rhubarb remains one of my all-time favorite flavors. Two years ago, I posted a recipe for a gluten free strawberry rhubarb crumble, but the food I eat is more than a little different these days. I thought it would be nice to re-visit that recipe & adjust the ingredients make it AIP, paleo, and even vegan! This crumble makes a great spring time dessert & would be a fantastic addition to an Easter menu. 

Strawberry Rhubarb Crumbles (AIP, Paleo, Vegan)

Strawberry Rhubarb Crumbles (AIP, Paleo, Vegan)

One of the joys (and sometimes struggles) of making AIP recipes is experimenting with new-to-me ingredients. This recipe was my first time baking with tiger nuts--I used tiger nut flour --which became the basis of the crumble topping, replacing the almond flour I used two years ago. At first glance, tiger nuts may not seem to be AIP, since nuts are officially out on the elimination process of the protocol, but tiger nuts are actually tubers/starchy vegetables, not nuts. Tiger nuts can be purchased both in their whole stage and ground as flour. I have to say I’m more of a fan of the flour & I foresee many future experiments with it! The flavor, once baked is slightly sweet & toasty-nutty, and I could have sworn I tasted a little vanilla, even though this recipe doesn’t contain a drop! (If you want to read more about tiger nuts, check out this post.)

Strawberry Rhubarb Crumbles (AIP, Paleo, Vegan)

Strawberry Rhubarb Crumbles (AIP, Paleo, Vegan)

While this crumble could be made for a crowd by baking the entire recipe in one large baking dish, I once again went the route of making individual crumbles. Regular dessert & treat consumption should not be a normal, every-day occurrence. A treat should be just that, a treat! Even though I have not consumed “regular” sugar in almost a year, I still have trouble with willpower around sweets. By making the crumbles individual, I resist the temptation to make my portion “just a little bigger” or eat “just a little more.” I very specifically used 4 oz freezer safe mason jars so that I can freeze the leftovers, thus once again removing further overeating temptation.

Strawberry Rhubarb Crumbles (AIP, Paleo, Vegan)

Strawberry Rhubarb Crumbles (AIP, Paleo, Vegan)

Also, how handy that the jars come with lids, making this an easily transportable dessert!  Add a spoon & they’re good for go. As we travel for the upcoming Easter holiday, I’ll be surrounded by non-AIP food, which still can be a bit tempting at times. But I’ll be prepared by freezing one or two of these crisps & bringing them along in a cooler. I’ll have my own tasty dessert without any detrimental side effects :)

Strawberry Rhubarb Crumbles (AIP, Paleo, Vegan)

Strawberry Rhubarb Crumbles (AIP, Paleo, Vegan)

Strawberry Rhubarb Crumble (AIP, Paleo & Vegan) 
Yields 4 - 6 servings, depending on jars 

For the crumble topping
2 T  Arrowroot 
Pinch Sea Salt
1 T Grade B Maple Syrup
2 T Coconut Oil, melted 

For the filling
1.5 c hulled & sliced strawberries
1.5 c sliced Rhubarb
2 T Maple Sugar (note: can sub more maple syrup, but filling will be more liquid-y)
  1. Preheat the oven to 350 F. 
  2. FOR THE TOPPING: Mix together all ingredients with a fork until well combined & crumbly. Reserve in the refrigerator until ready to assemble.
  3. FOR THE FILLING: combine the sliced strawberries & rhubarb. Drizzle the maple syrup over the fruit. Add the arrowroot starch. Mix to combine. 
  4. ASSEMBLE: Sprinkle 1 1/2 tsp of topping into the bottom of a small ramekin or mason jar. Add a heaping 1/2 cup to 2/3 cup portion of the strawberry-rhubarb filling. Press down the fruit slightly to compress. Spoon two tablespoons of topping over the fruit. 
  5. Place the crumbles onto a rimmed pan. Pour water into the pan, making a water bath to protect the containers during the baking process. 
  6. Bake for 45 minutes, or until the topping is golden & the fruit is bubbly. 
  7. Cool slightly before serving. Refrigerate or freeze any leftovers. 
Notes: 
  • To make the recipe coconut-free, substitute another fat of choice for the coconut oil
  • If you really like crumble topping, plan to double the topping recipe--it's addictively delicious! 
This post contains affiliate links. Thanks for supporting Sweet Treats.