Slow Roasted Salmon with Herbed Yogurt (AIP, Paleo, low FODMAP, Whole 30)

Slow Roasted Salmon with Herbed Yogurt (AIP, Paleo, low FODMAP, Whole 30)

Wild-caught salmon is an ingredient I almost always keep stocked in our freezer. Not only is it a superfood protein, but salmon is also quick and easy to both thaw AND cook. Plus, it’s delicious :)

Slow Roasted Salmon with Herbed Yogurt (AIP, Paleo, low FODMAP, Whole 30)

As much as I love to meal plan (really, I do love having a plan), I still find myself uninspired on occasion. There are times I find myself gazing into the refrigerator and freezer, wishing the illusive dinner faeries would show up & make a meal for me. Some days, I’m tired, or I’ve been working on other tasks & lost track of the time, or I’ve miscalculated the time it will take to thaw another protein, or I’m missing key ingredients. In those cases, salmon can come to the rescue!

Slow Roasted Salmon with Herbed Yogurt (AIP, Paleo, low FODMAP, Whole 30)

Most salmon recipes I’ve seen call for the fish to be cooked at high temperatures. Sautéing at high heat. Broiling. Roasting. When I saw a recipe, via my Facebook newsfeed, for a slow roasted salmon, baked at a very low temperature, I was intrigued. The recipe required only a few very tiny tweaks to keep it completely AIP. I soon tried it out & was hooked!

Slow Roasted Salmon with Herbed Yogurt (AIP, Paleo, low FODMAP, Whole 30)

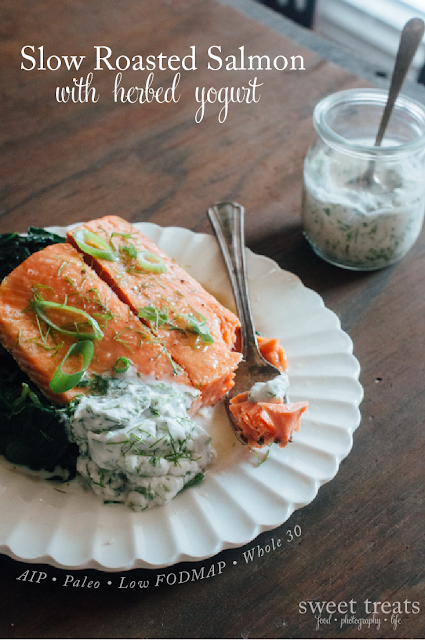
The finished salmon is much more tender & almost creamy than if it was cooked at higher temperatures. We’ve enjoyed eating the salmon warm for dinner, like these pictures, often paired with an herbed yogurt & sauteed spinach. Or, I usually make an extra filet or two & eat the leftovers cold on salad the following day.

Note on FODMAPs: FODMAPs are confusing things... Certain resources will say that one item is “ok” and other resources will list that item as “avoid.” I am choosing to get my information about FODMAPs from Monash University & their app. Monash is continually updating their information & they are great about listing what quantity of food (both by volume & by weight) keeps it within the low FODMAP guidelines. As always, though, you know your body best. Just because one list says a food is fine, doesn’t always mean your body will be fine with it. Or on the flip side, just because one list says a food is on the avoid list, doesn’t mean your body is automatically going to be bothered by it. Do what makes your body & mind feel the best.

Slow Roasted Salmon with Herbed Yogurt (AIP, Paleo, low FODMAP, Whole 30)
Yields two servings, but can easily be scaled up for more servings

For the salmon
adapted from Sally Schneider via Food52

1 Tbl Olive Oil, divided
2 filets (approximately 12 to 16 oz) Wild-caught Salmon
1/2 tsp Sea Salt
bunch Fresh Thyme

sliced scallion & chopped dill, for serving
Herbed yogurt (recipe follows), for serving
  1. Preheat the oven to 275 F (I usually use my toaster oven). Oil a small sheet pan with half the olive oil. 
  2. Place the salmon filets skin side down on the prepared pan. Drizzle the remaining oil over the top of the fish & sprinkle with salt. Tuck several sprigs of fresh thyme underneath each salmon filet. 
  3. Roast for 15 to 20 minutes, or until the salmon reaches an internal temperature of 120 F. 
  4. Remove from the oven & sprinkle with sliced scallion & chopped dill. Serve with herbed yogurt (recipe follows), if desired. 

For the herbed yogurt
1/2 c Two-Ingredient Coconut Yogurt 
1 Tbl (approximately 3 g) chopped dill
1 Tbl (approximately 2 g) chopped parsley
1 Tbl (approximately 5 g) chopped scallion
1/4 tsp Sea Salt
  1. Mix all the ingredients together. 
  2. Store in the refrigerator until ready to serve.  
Sautéed Spinach 
Yields two servings 

4 Tbl Oil of choice (avocado, olive, melted duck fat or bacon drippings etc.) 
550 g fresh spinach
  1. In a large pan, heat the oil over medium high heat. 
  2. Add the fresh spinach (in batches, if necessary) to the hot pan, cover and turn off the burner. Allow the spinach to wilt down. 
  3. Serve immediately. 
Beef Stew (AIP, Paleo, Low FODMAP, Whole 30)

Beef Stew (AIP, Paleo, Low FODMAP, Whole 30)

Traditionally, as summer moves to fall, many people’s preferences move from grilling to braising and roasting. I confess that even though it was considered seasonally inappropriate, I kept braising and roasting throughout the summer. I blame it on my new favorite kitchen appliance, my Instant Pot (or as my mom refers to it, a “turbo crock-pot”). 

Beef Stew (AIP, Paleo, Low FODMAP, Whole 30)

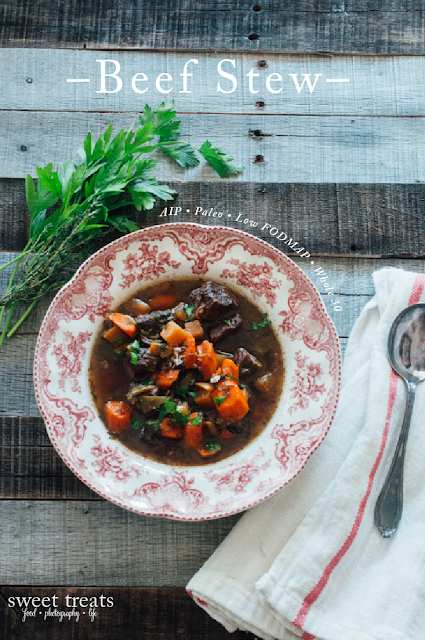
With the help of my Instant Pot  I’ve been making this beef stew since July when I originally went back to strict AIP & added a low FODMAP component. I didn’t know if it was possible to make palatable beef stew without high FODMAP ingredients like onions, shallots, garlic & mushrooms. Brainstorming different vegetable options & changing my mindset of what were “necessary” stew ingredients allowed me to create this really phenomenal stew. 

Beef Stew (AIP, Paleo, Low FODMAP, Whole 30)

My preference these days is to make as many things in my Instant Pot ,  as possible, but since I realize that not everyone may have this particular appliance, I’ve written out stovetop approximations too. One of the other things I appreciate about this recipe is that it is comprised of primarily “staple” ingredients, or ingredients that I generally have on hand all the time. Carrots, and rutabaga are really hearty veggies that keep in the refrigerator for a good amount of time. Leek greens, if stored properly, can also last a while. I keep meat, broth, and bacon in the freezer at all times. And in a pinch, dried herbs can be substituted for fresh ones. 

Beef Stew (AIP, Paleo, Low FODMAP, Whole 30)

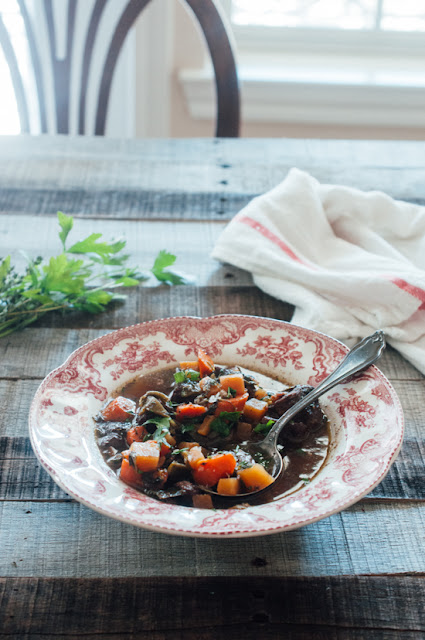
The stew is really great on its own, but if you want to bulk it up further or serve it for a celebratory meal, I also like to serve it over mashed (white) sweet potatoes or squash. And I’ve often added a few spoonfuls of braised greens (I love this recipe from the Paleo Cajun Lady, & usually make it with chopped swiss chard & bacon & omitting the garlic to make it Low FODMAP) to the stew to up the vegetable content. Additionally, the leftovers freeze beautifully & there’s nothing quite like finding a jar of delicious beef stew in your freezer on a day when you’re not in the mood to cook.  

Beef Stew (AIP, Paleo, Low FODMAP, Whole 30)

Note on FODMAPs: FODMAPs are confusing things... Certain resources will say that one item is “ok” and other resources will list that item as “avoid.” I am choosing to get my information about FODMAPs from Monash University & their app. Monash is continually updating their information & they are great about listing what quantity of food (both by volume & by weight) keeps it within the low FODMAP guidelines. As always, though, you know your body best. Just because one list says a food is fine, doesn’t always mean your body will be fine with it. Or on the flip side, just because one list says a food is on the avoid list, doesn’t mean your body is automatically going to be bothered by it. Do what makes your body & mind feel the best.

Low FODMAP Beef Stew (AIP, Paleo, Whole 30)
Yield’s 6 to 8 servings 

2 Tbl solid fat (I used duck fat, but bacon drippings or lard could be substituted as well) 
2 lbs Grassfed Beef Stew Meat 
4 strips Bacon, cut into small pieces 
2 heaping cups (approximately 140 g) chopped leek greens and/or scallion greens (I used a mix of the two) 
2 heaping cups (approximately 425 g) chopped carrots 
2 heaping cups (approximately 365 g) cubed rutabaga 
1.5 c bone broth
1.5 c red wine (I’ve used both merlot and cabernet sauvignon) 
2 dried bay leaves
1 Tbl salt
Few sprigs of fresh thyme & parsley, plus additional for serving 

Instant Pot Instructions: my preferred method of cooking 
  1.  Add the fat to the insert of an Instant Pot . Turn the pot onto “Sauté” & allow the fat to melt. 
  2. Dry the meat very well. Brown the beef on all sides, in batches, in the sautéing Instant Pot --it usually takes me three batches to brown 2 lbs of stew meat. Remove the browned beef & set aside. 
  3. Sauté the bacon & leek/scallion greens in the Instant Pot until the bacon begins to crisp & the leeks/scallions begin to wilt. Stir occasionally. 
  4. Add the carrots & rutabaga, broth, wine, and browned beef. Stir to combine. Tuck the bay leaf & herbs into the mixture. 
  5. Place the top on the Instant Pot & make sure the vent is closed . Pressure cook using the manual setting for 50 minutes at high heat. Note: the entire process will take longer than 50 minutes because it does take time for the pot to come up to pressure. 
  6. Once the machine has beeped, allow it to switch to the “keep warm” function or turn completely off for 15 minutes to let the pressure come down a bit. Use a silicone oven mitt or heavy kitchen towel to move the vent from the “sealing” position to the “venting” position. Allow all the steam to escape then it is safe to open the lid.
  7. Serve the stew on its own, or along side a starchy vegetable. Adding extra cooked greens is also a great option. Sprinkle with some extra chopped herbs just before serving. 
  8. Store any leftovers in the refrigerator or freezer. 
Stovetop Instructions 
  1. In a large dutch oven, melt the fat over medium high heat. 
  2. Dry the meat very well. Brown the beef on all sides, in batches if necessary. Remove the browned beef & set aside.
  3. Sauté the bacon & leek/scallion greens until the bacon begins to crisp & the leeks/scallions begin to wilt. Stir occasionally.
  4. Add the carrots & rutabaga, broth, wine, and browned beef. Stir to combine. Tuck the bay leaf & herbs into the mixture.
  5. Bring to a simmer, reduce the heat to low, cover & allow to gently cook for 2-4 hours, or until the beef is tender. 
  6. Serve the stew on its own, or along side a starchy vegetable. Adding extra cooked greens is also a great option. Sprinkle with some extra chopped herbs just before serving. 
  7. Store any leftovers in the refrigerator or freezer.
This post contains affiliate links. Thanks for supporting Sweet Treats. 

Kurt Adam's

MESOTHELIOMA LAW FIRM
Mesothelioma survival rates, structured settlements annuities, structured settlement buyer, mesothelioma suit, mesothelioma claim, small business administration sba, structured settlement purchasers, wisconsin mesothelioma attorney. Structured settlement annuity companies, houston tx auto insurance, mesothelioma lawyer virginia, seattle mesothelioma lawyer,  mesothelioma attorneys california.

Passion Fruit Yogurt Parfaits with Cassava Crumble (AIP, low FODMAP, Paleo, Vegan)

Passion Fruit Yogurt Parfait with Cassava Crumble (AIP, low FODMAP, Paleo, Vegan)

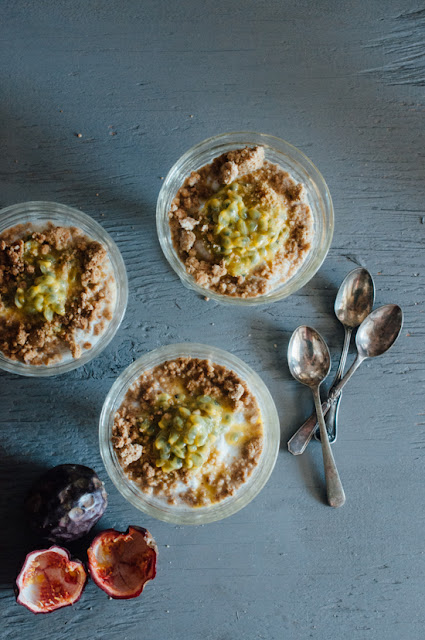
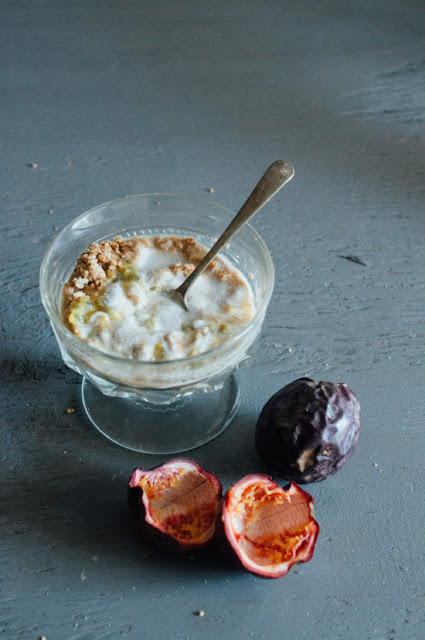
For the past month or so, I’ve been making at least one batch of AIP two-ingredinet Instant Pot coconut yogurt a week, as I developed & finessed the recipe. I’ve used the yogurt in several applications, but this parfait might be one of my favorite sweet servings. I love using just a hint of maple & letting the sweet/tart flavor of the yogurt + fruit shine through. And let’s not forget about the crunch of the toasted cassava crumble, which makes a great stand-in for granola.

Passion Fruit Yogurt Parfait with Cassava Crumble (AIP, low FODMAP, Paleo, Vegan)

I’m not really sure if this passion fruit coconut yogurt parfait should be classified as a treat or as a breakfast food. For the sake of AIP nutrient density guidelines, it should probably be a treat, but I must admit, I have eaten one or two for breakfast, alongside a serving of protein and vegetables.  

Passion Fruit Yogurt Parfait with Cassava Crumble (AIP, low FODMAP, Paleo, Vegan)

Passion fruit isn’t always easy to find, but often Asian grocery stores will carry it. Back in August, I was thrilled to find actual passion fruits on sale at Whole Foods. I really, really love the tart, flower-y flavor of passion fruit--it’s almost like sour candy for adults. We even had passion fruit curd filing on one of our wedding cakes. And passion fruit is low FODMAP too! Yay! Just don’t eat more than 5 at one time….   

Passion Fruit Yogurt Parfait with Cassava Crumble (AIP, low FODMAP, Paleo, Vegan)

When ripe, the fruit should be dark purple on the exterior & wrinkly. Cut the ripe fruit in half & use a spoon to scoop out the pulp & seeds--both are edible. I personally like the crunch of the seeds, but you could go through the laborious task of straining out the seeds, if desired. 

Passion Fruit Yogurt Parfait with Cassava Crumble (AIP, low FODMAP, Paleo, Vegan)

This parfait could be made with other fruit too, if passion fruit can’t be found or aren’t to your liking. I’ve also tried mixed berries (blueberries/strawberries/raspberries are all low FODMAP), as well as a rhubarb compote similar to this one (substituting maple for the honey to keep it low FODMAP). 

Passion Fruit Yogurt Parfait with Cassava Crumble (AIP, low FODMAP, Paleo, Vegan)

Note on FODMAPs: FODMAPs are confusing things... Certain resources will say that one item is “ok” and other resources will list that item as “avoid.” I am choosing to get my information about FODMAPs from Monash University & their app. Monash is continually updating their information & they are great about listing what quantity of food (both by volume & by weight) keeps it within the low FODMAP guidelines. As always, though, you know your body best. Just because one list says a food is fine, doesn’t always mean your body will be fine with it. Or on the flip side, just because one list says a food is on the avoid list, doesn’t mean your body is automatically going to be bothered by it. Do what makes your body & mind feel the best.

Passion Fruit Yogurt Parfait with Cassava Crumble (AIP, low FODMAP, Paleo, Vegan)

Passion Fruit Yogurt Parfaits with Cassava Crumble (AIP, low FODMAP, Paleo, Vegan) 

Crumble
1/8 tsp Sea Salt
1 1/2 tsp Grade B Maple Syrup
28 g / 2 Tbl Coconut Oil
  1. Preheat oven to 350 F. Line a baking sheet with parchment paper. 
  2. Mix all the ingredients with a fork in a small bowl until the ingredients are crumbly. 
  3. Spread in an even layer (clumps are ok) on the prepared baking sheet. 
  4. Bake for 10 minutes, rotate the pan, and bake an additional 5 to 10 minutes, or until golden. Set aside to cool
Vanilla Maple Coconut Milk Yogurt
yields enough for 3 parfaits 

1 c Two Ingredient Instant Pot Coconut Yogurt (or other AIP-compliant coconut yogurt) 
  1. Add all the ingredients to a mixing bowl. Stir to combine. Reserve in the refrigerator until ready to assemble parfaits & serve. 
Assembly--per parfait 
**assemble right before serving**

1/3 c Vanilla Maple Coconut Milk Yogurt 
seeds from 1 Ripe Passion fruit
1 Tbl Crumble 
  1. Portion the yogurt into a small bowl or other small vessel. 
  2. Top the yogurt with half of the passion fruit pulp/seed. 
  3. Sprinkle the crumble over the top. Add the remaining passion fruit. 
  4. Serve immediately. 
This post contains affiliate links. Thanks for supporting Sweet Treats. 

Two-Ingredient Instant Pot Coconut Milk Yogurt (AIP, Paleo, Low FODMAP)

Two-Ingredient Instant Pot Coconut Milk Yogurt (AIP, Paleo, Low FODMAP)

Ah, the amazing Instant Pot  When my slow-cooker/crockpot broke, I switched to “Team Instant Pot" & have not looked back or second guessed my decision. Instead, I’ve wondered how I have survived so long on AIP without this indispensable appliance!

Two-Ingredient Instant Pot Coconut Milk Yogurt (AIP, Paleo, Low FODMAP)

My latest obsession is Instant Pot oconut milk yogurt. My next two posts will utilize coconut yogurt in both a savory & sweet applications, so it only made sense to give coconut milk yogurt it’s own post :)

Two-Ingredient Instant Pot Coconut Milk Yogurt (AIP, Paleo, Low FODMAP)

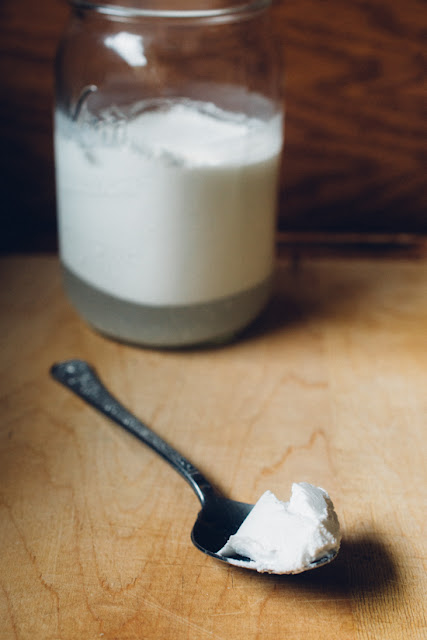
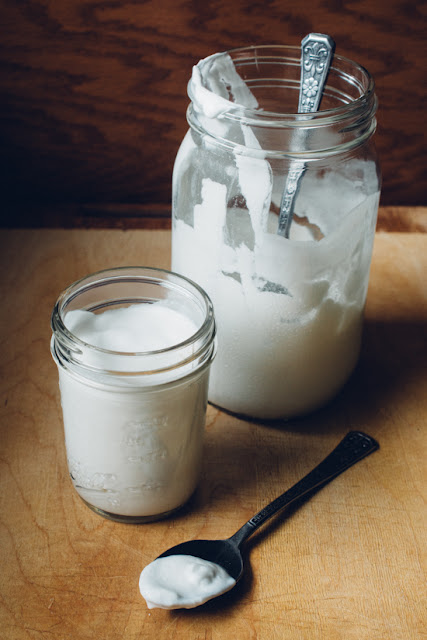
Homemade coconut milk yogurt is completely different than any other yogurt I’ve ever tasted. I use to occasionally splurge on commercially made coconut milk yogurt, but most brands have some not-so-great additives, and I didn’t really love the flavor or texture. My homemade version has just enough tang without being exceptionally sour & a slight coconut-y essence without being super sweet coconut. The yogurt separates very easily, making it is very easy just scoop off the thickened top portion, almost like sour cream. Or for more of a yogurt “sauce” consistency, vigorously shaking the jar works well.

I did not realize how much I was missing cultured dairy products, like sour cream, creme fraiche, and yogurt, until I began making this completely AIP coconut milk yogurt. I can see a whole world of applications, from sweet uses, to savory uses, to dressings & sauces and so much more!  The possibilities are endless.  

Two-Ingredient Instant Pot Coconut Milk Yogurt (AIP, Paleo, Low FODMAP)

PS, if anyone else is looking for great Instant Pot recipes, check out this round up from Phoenix Helix.

Note on FODMAPs: FODMAPs are confusing things... Certain resources will say that one item is “ok” and other resources will list that item as “avoid.” I am choosing to get my information about FODMAPs from Monash University & their app. Monash is continually updating their information & they are great about listing what quantity of food (both by volume & by weight) keeps it within the low FODMAP guidelines. As always, though, you know your body best. Just because one list says a food is fine, doesn’t always mean your body will be fine with it. Or on the flip side, just because one list says a food is on the avoid list, doesn’t mean your body is automatically going to be bothered by it. Do what makes your body & mind feel the best.

Two-Ingredient Instant Pot Coconut Milk Yogurt (AIP, Paleo, Low FODMAP) 

2 caps Xymogen Probiomax DF Probiotic (or other comparable multi-strain probiotic; this one has 100 billion CFUs)
1 33.8 fl oz carton AROY-D Coconut Cream
2 sterile quart-sized mason jars + sterile lids
  1.  Empty one probiotic cap into each jar. Divide the AROY-D Coconut Cream evenly between the two quart-sized mason jars  Cap the jar with a sterile lids & shake well to combine. 
  2. Place both jars into the stainless steel insert of an Instant Pot 7-in-1 Pressure Cooker. Seal the top. Set the vent to “sealing” 
  3. Press the “yogurt” button & set the time to 12 hours. 
  4. After 12 hours, remove the jars from the Instant Pot  Refrigerate, uncovered for at least 12 additional hours before consuming. Top with a lids & continue storing in the refrigerator. 
Notes: 
  • The yogurt may separate unto more solid yogurt at the top & what looks like water at the bottom. I mix the two together, producing a more liquid-y yogurt. If you prefer, just take the top layer for a thicker product. 
  • I have not tried this yogurt with any other brand of probiotics, but I believe other mulit strain protiotics should work. 
  • I do not recommend using a soil-based probiotic like Prescript-Assist for this application. 
  • I have not tried any other brand of coconut cream other than AROY-D Coconut Cream  nor have I substituted coconut milk instead of cream.  
This post contains affiliate links. Thanks for supporting Sweet Treats. 

Arnold Palmer Gummies (AIP, Low FODMAP, Paleo)

Arnold Palmer Gummies (AIP, Low FODMAP, Paleo)

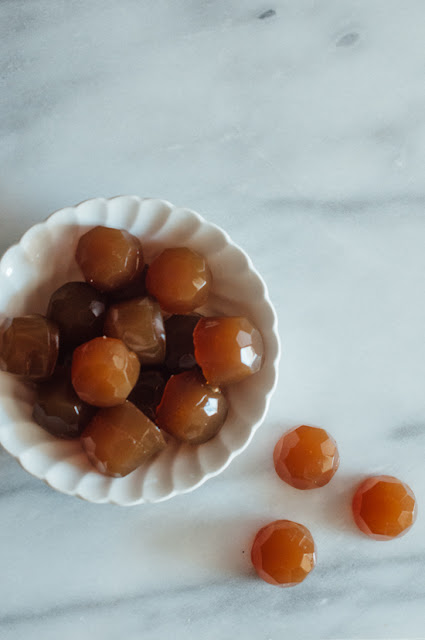
This weekend--Labor Day weekend in the US--might signal the unofficial end of summer, but the flavors of summer can continue year round with these Arnold Palmer-inspired gummies. 

Arnold Palmer Gummies (AIP, Low FODMAP, Paleo)

While lemonade & sweet tea can be consumed any time of the year, I find myself indulging in them more in the summer time than in the winter. Of course my methods for making said lemonade & tea have changed pretty drastically since I went AIP/Paleo--I’ve taught myself to drink “lemonade” with just filtered water + a generous splash of lemon juice, no sweetener, including the “allowed” ones like maple syrup and honey (high FODMAP alert). But when it comes to gummies, a little bit of sweetness is necessary to counteract the slight gelatin flavor. 

Arnold Palmer Gummies (AIP, Low FODMAP, Paleo)

I’ve been very intentional in my gelatin & collagen consumption since going low FODMAP in July to combat my stubborn case of SIBO. Collagen goes in my tea every morning. There’s almost always a batch of gelatin-rich gummies in the refrigerator, like my various test batches of this Arnold Palmer-inspired recipe. Barely sweetened panna cotta with low FODMAP berries (strawberries, raspberries, blueberries) is a regular occurrence.

Arnold Palmer Gummies (AIP, Low FODMAP, Paleo)

 While it is sort of difficult to report on how the gelatin/collagen is improving my digestive system & helping to heal my gut, I can most definitely notice an improvement in my skin, hair, & nails. Plus, a couple weeks ago, my new holistic dentist’s ultrasound scan of my jaw revealed some pretty extreme jaw cavitations (i.e. holes in my jaw) leftover from when I had my wisdom teeth extracted over a decade ago (I’ve posted more about this over on Instagram). I’m hoping that the gelatin/collagen will also aid in my (and my dentist’s) goals of stimulating my body to re-grow that bone & heal itself. When healing tastes as great as these gummies, I’ll totally take it ;)

Arnold Palmer Gummies

For the Tea...
1 large sachet of Rishi Tea Summer Lemon blend (each bag weighs around 8 g)
16 fl oz / 2 c Filtered Water
  1. Bring the water to a boil over high heat. Place the tea sachet into a large liquid measuring cup. 
  2. Pour the boiling water over the tea sachet & allow to steep for 8 hours, first by cooling to room temperature & then placing the measuring cup in to the refrigerator. 

Note: if you can’t find Rishi Lemon Ice Tea blend, peel a couple thin strips of peel only (no white pith) from a washed lemon & steep it with a couple black tea sachets & the hot water. 

For the gummies 
1 3/4 c Steeped Tea (see above) 
28 g / 4 Tbl Pasture-Raised Gelatin (NOT collagen--collagen will not gel!) 
a few drops of organic lemon essential oil, optional, or a couple strips of lemon peel (no pith) 
  1. Mix the tea & lemon juice in a medium sauce pan. Whisk in the maple syrup. Sprinkle the gelatin over the liquid & allow to bloom for 5 minutes.
  2. Heat the pan over medium heat, whisking gently, until the gelatin completely melts. 
  3. Remove from the heat & add the optional lemon oil, if desired. 
  4. Pour the liquid into silicone molds (I used this silicone mold or into a large baking dish. (I usually transfer the mixture to a liquid measuring cup for ease of pouring). 
  5. Refrigerate the molds for 2 hours, or until set. Gently pop the gummies out of the mold or cut them into squares.
  6. Store the gummies in the refrigerator. 


This post contains affiliate links. Thanks for supporting Sweet Treats.